

- Apr 16, 2021
- 3 min read
Updated: Sep 20, 2021

Learn how to create these toadstool mushrooms from recycled cardboard and toilet paper rolls. Using easily accessible materials from your recycling bin. You won’t need to buy the materials and can create an eco-friendly craft.
After you create this craft you can use them as a teaching tool in various ways.
Teach your child about wild mushrooms: Help show what a poisonous mushroom in the wild would look like. These are based on the poisonous Amanita Muscaria (Fly Agaric) Mushrooms. Play ‘hunting for wild mushrooms’ in your backyard. This game can help teach what you would do if you find a real mushroom with white spots in the forest. Teaching a child not to touch it, and instead yell out and point at it to get a parents attention. Hide them in plain sight or make it harder and hide them buried a bit in the forest floor covering. Of course, these ones you can touch so enjoy them in pretend play as well. Preschool and Homeschool Games:
MATH: You can use the mushrooms in math games and count the white dots or add up different sides together or use each mushroom as an early counting game.
Coordination and Balance: Stack them on top of one another and balance them.
Writing and Reading: Place notes inside the stem of the mushroom, inside the toilet paper roll. when the child finds the mushroom on the mushroom hunt, they can read a special note or a clue for the next step in the game. The child learning to write can write the notes and hide it.

Make as many as you’d like!

You can make them just with cardboard or add more creativity! We added birch bark to some of the stems and also some ripped tissue paper balled up as the spots on a few of them!

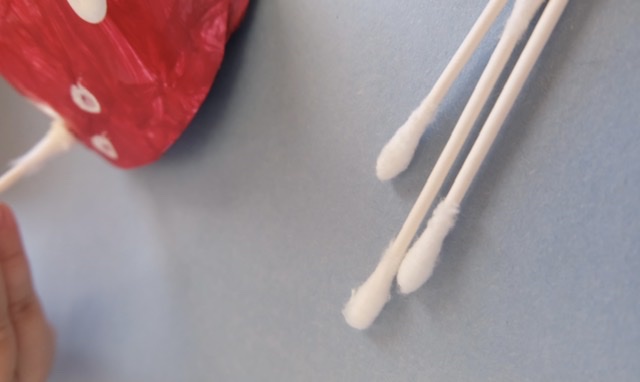
These are easy to paint for all ages because of the large area with the one red colour, and once that dries add the dots with a Q-tip. It will make the perfect circle for you, so that you don’t have to.

Materials:
Toilet paper roll
Cardboard from a double layered box - thick cardboard
White and red paint (washable or acrylic)
Painter’s palette
Scissors
Glue - white glue or a glue gun
A pencil
Water in a glass jar to clean the brushes
Paint brush - medium sized
Q-tip
Birch Bark (if desired)
Tissue Paper (if desired)

Slideshow Steps:


STEPS:
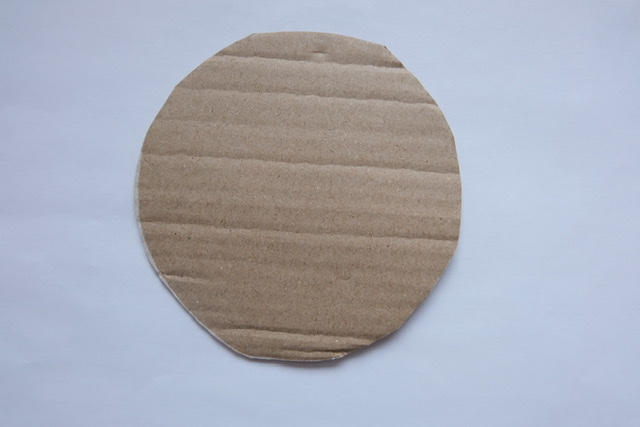
1. Draw a circle onto a piece of cardboard. About 4 inches in diameter.

2. Cut out the circle.

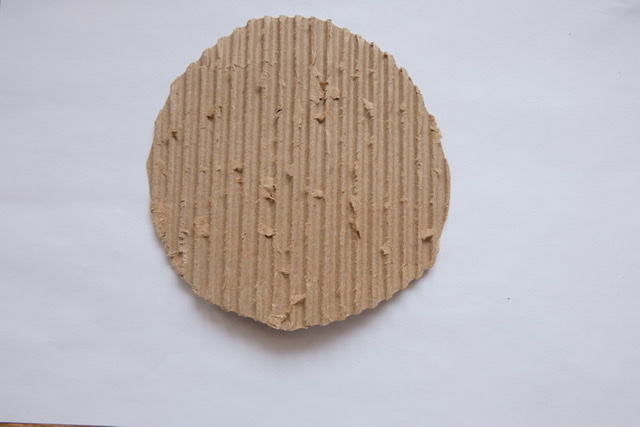
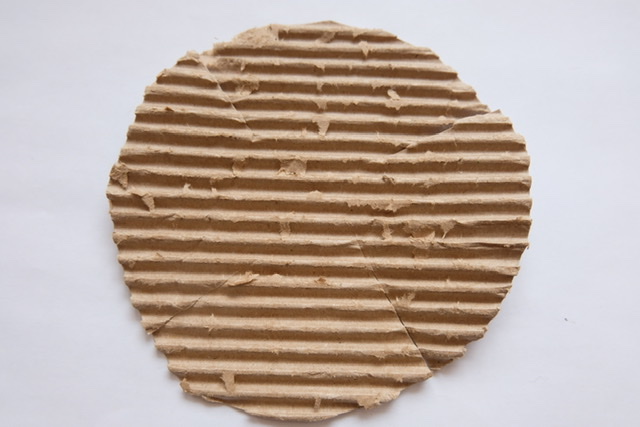
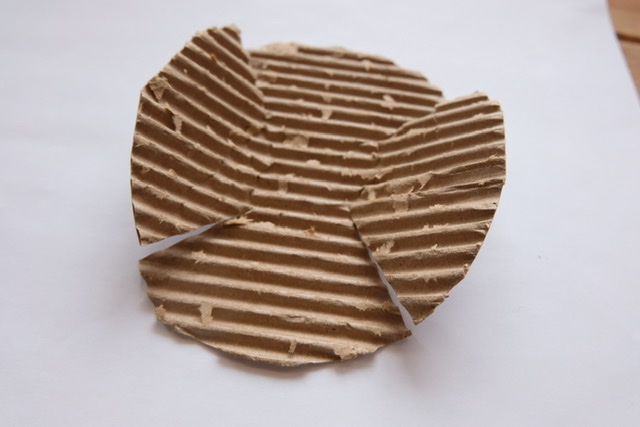
3. If you want to make the gills on the mushroom, rip off the first paper layer on one side to expose the corrugated cardboard.

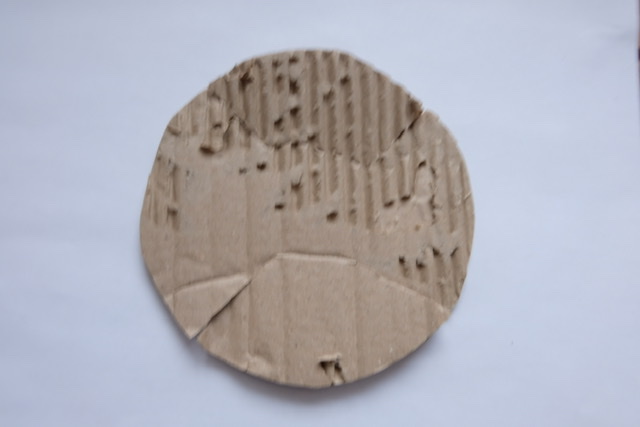
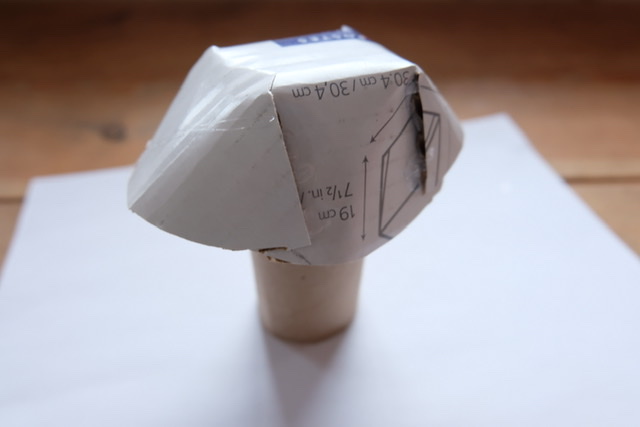
4. Cut Four slits like in the photo about 1.5 inches deep, evenly spaced around the circle, or two slightly closer together at both ends.

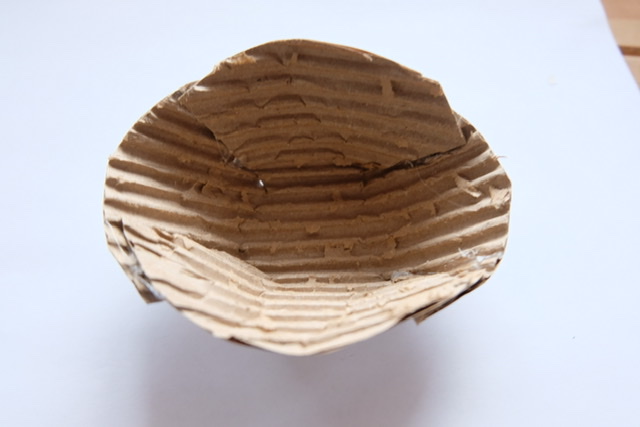
5. Glue the slits back together, placing one edge over top of the other edge. The two vertical ends on the outside and the horizontal ones tucked inwards. See photos.
If you want the glue to dry fast, use a glue gun. If you don’t mind waiting until it’s time to paint them, use white school glue.


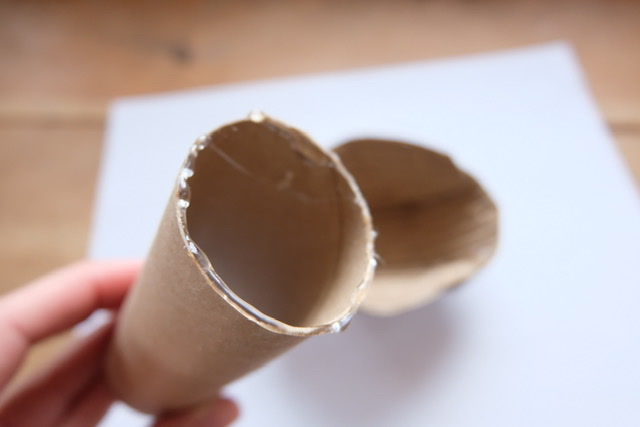
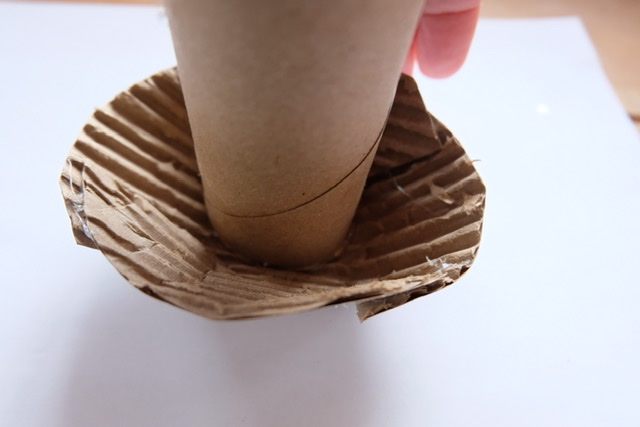
6. Glue the edge of a toilet paper roll onto the middle of the underside mushroom top.


7. Paint the stem white, and the underside of the mushroom.
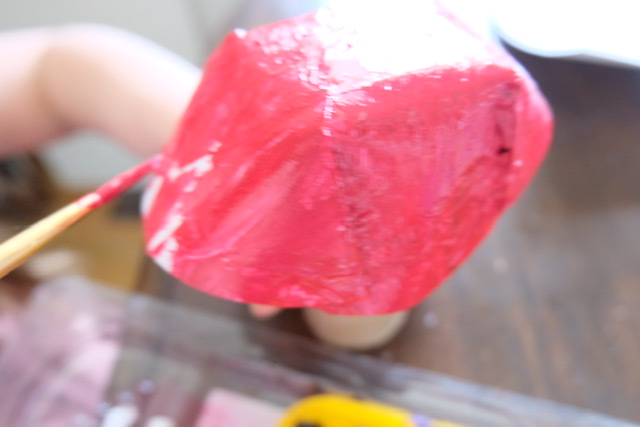
8. Paint the top of the mushroom red and allow it to dry.

9. Add the spots on the mushroom using a Q-tip and white paint. Dab a dot or make the dots bigger by making a circular motion with the Q-tip outwards, until you get the size you like. You can also add rolled up pieces of tissue paper for the spots and glue them onto the red part of the mushroom.


10. For added detail, add a paper or tissue paper ring around the stem.
11. Allow it to dry and then have fun with your new mushroom toy and learning tool.

Play ‘Hunt the Mushroom’ outside in the forest. Learn all about Amanita Muscaria (Fly Agaric) Mushrooms. They are Poisonous, so teach that these are the only ones you can touch!

You can wrap birch bark around the stem for some added Artistic nature detail!

We hope you enjoy this fungi craft and that you learn a bit more about fly Agaric mushrooms. If you make this craft, feel free to tag us @acorns.and.aprons. We may feature your creation as a story!


Comments